Welcome
-
Back to School
My vest-making projects came to halt in late July, when I enrolled in an online course “Introduction to Photoshop.” My previous attempts to use Photoshop had been unsuccessful, despite doing the tutorials and watching YouTube videos, so my husband suggested I look for a class. The course was offered by www.ed2go.com through my local community college.
Little did I know that the class would pretty much take over my summer—I spent many hours completing each of the twelve lessons; however, I can honestly say that I learned a lot and now love creating artwork in Photoshop.
I knew from my past attempts to use Photoshop that some of the basic concepts were layers and masks. These features allow you to combine elements from different photos while leaving the original photo unchanged. I learned how to create a basic photo composite and then added complexity by applying various effects (filters) and adjustments. For example, when creating a composite you would need to add shadows to make the picture look realistic.
My primary goal was to improve the pictures on my blog and create a portfolio of my hand-made items. I found that many of my pictures had distracting backgrounds. By the end of July, I could successfully replace the backgrounds and create simple composites for my post A Year of Vests.
Other topics included photo editing and retouching, color theory, and the difference between raster and vector images (graphic files that are infinitely scalable, while raster files are composed of pixels so resolution is lost when scaled up in size). My favorite topic was digital painting, which I used to create virtual costumes for our dogs, which you can read about in my post Happy Halloween! I recently started using my new skills to design custom greeting cards for friends and family, as well as our annual Christmas card.


One of my other goals was to develop a new logo. I purchased my crown logo from Fiverr earlier this year, but I wanted to create a new logo that would combine the various elements of my website/blog. My new logo design started with the traditional railroad crossing signal (to focus on my father’s ALCO books I have for sale in my On Track Publishers Book Store). I created a more abstract design by eliminating the R R and replacing the yellow and black with custom colors to represent my interests in cross-stitch and quilting. I chose a triadic color theme using the mauve color from my crown logo. I am gradually introducing my new design to my blog and social media accounts.


About halfway through the class my new Apple MacBook Air finally arrived, so that made the class even more fun!

-
Happy Halloween!

Virtual Halloween Costumes created using Adobe Photoshop During the past few years I have made very elaborate Halloween costumes for our three dogs. In 2019, our groomer wanted to turn Topper into a unicorn. She decorated Daisy as a rainbow, and I resurrected my rainbow costume I had made nearly 40 years ago.

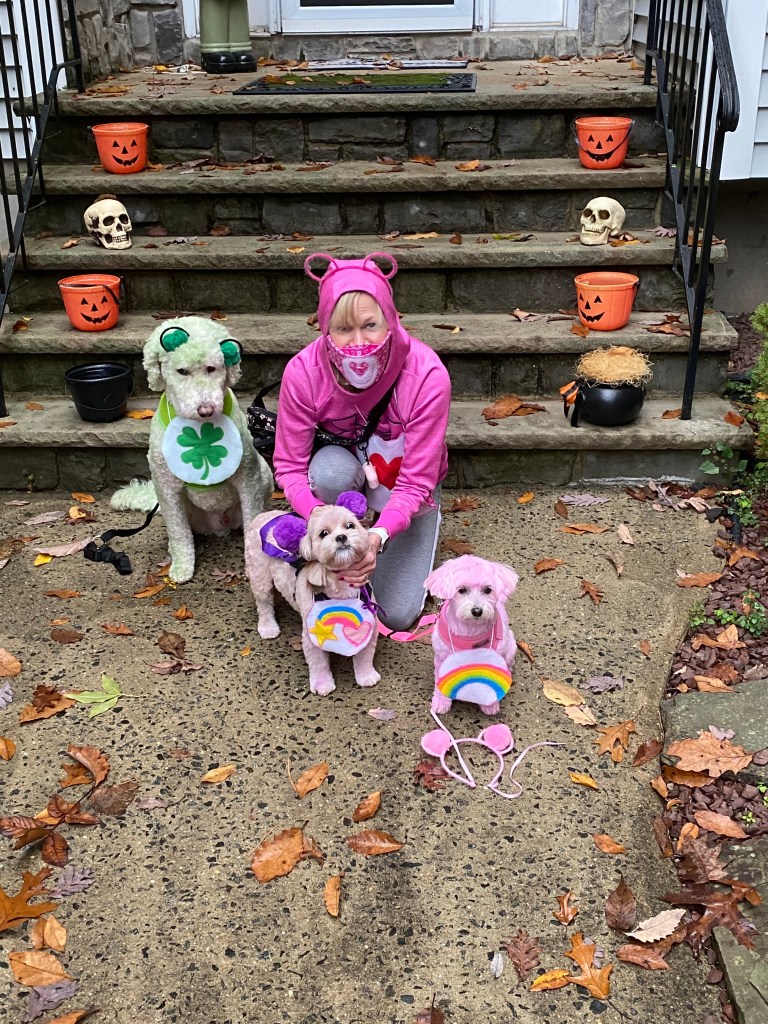
In 2020 we adopted our third dog, Bear, and I was inspired to turn the dogs (and willing family participants) into Care Bears. My groomer also helped by painting the dogs and making the headpieces.
In 2021 I continued the Bear theme, this time recreating Winnie the Pooh (our nickname for Bear is actually Pooh Bear). I used a combination of store bought and hand made costumes. As you can see, no one (but me) looked too happy in costumes.

Halloween 2019 was a rain-out and there were no trick-or-treaters in 2020 and 2021 due to the Pandemic. Furthermore, most of the neighborhood kids have moved out or left for college. So this year, I decided to skip the hassle of dressing the dogs and posing for pictures by creating virtual costumes to post on Instagram, Facebook, etc.
Over the summer I had completed an online Photoshop class offered by ed2go.com through my local community college. I basically wanted to learn how to make composites for my blog, but the 12-lesson course was very comprehensive and I enjoyed learning a variety of techniques, such as digital painting and photo restoration. I particularly enjoyed digital painting, so I thought I would incorporate this technique into my Halloween costume design.
Our final assignment was to create a portfolio with a sampling of the projects we completed during the class, as well as any of our own work. My portfolio is available at https://behance.net/kingontrack.
During my online class, I learned about a website called Pixabay.com to search for free images (see note below). I searched “Halloween background” and downloaded the pumpkin image. I also searched on “haunted forest” for additional background ideas. Which background do you prefer?

For instructions click here.
-
The Blog is Back!
After taking a break from blogging about our adventures (and misadventures) with our 2015 Roadtrek E-trek, I decided to reinvent my blog with a focus on my other interests, which include sewing, quilting, and scrapbooking, I have included the old blog posts, since RV travel remains very popular (although not for us) and people may still be looking for information about the E-trek. According to RV Lifestyle, there will be a huge demand for used RVs in 2021.
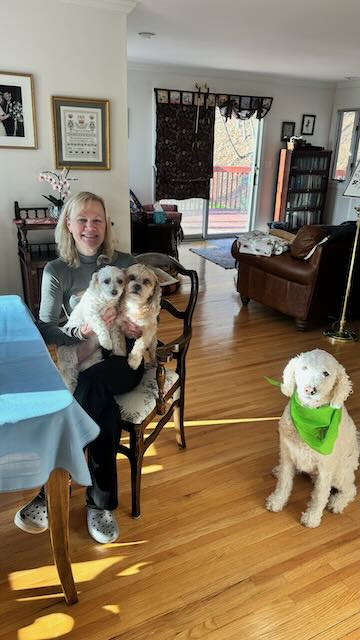
Although it has been four years since we sold our E-trek, we still keep up with the latest Class B Motorhome offerings. In 2020 we adopted a third dog, Bear, and we still have our “Etrek Dogs,” Topper and Daisy, who were featured in The Etrek Blog.

Daisy, Topper, and Bear During the Pandemic I rediscovered my love of sewing and purchased a new Janome sewing machine. After making a supply of masks, I moved on to various custom items, such as a car seat organizer for my husband’s car. I modified the seat covers we had purchased for our E-trek with pockets on the front to hold cell phones, masks, and sunglasses, as well as a hanging organizer for the dogs’ accessories. Eventually I hope to offer some of my custom-made items for sale and add them to my Etsy store.
-
Spring Update
Daisy Fidget Quilt
After finishing taxes it was time to get creative again. I usually try to make something for Mother’s Day for my mother-in-law. Last year it was the Petal Jewelry Pouch. This year I decided to try a “Fidget Quilt.” I looked at a number of examples on Pinterest and Etsy for inspiration. It was a great way to use up scraps from some of my other projects as well as various notions I had collected, such as tulle from my dogs’ groomer.


I had recently downloaded a cute pattern from Sewspicious called Scrappy Puffy Flower Tutorial. I decided to make the flowers the focus of my quilt. I had some cute bear fleece fabric as well as some other fleece fabric I had used to back a previous quilt. I found some Daisy trim, Bee ribbon. I also wanted to incorporate a zipper into the design and I found some textured brocade fabric to use. I secreted one of my custom “handmade by Marjorie” labels inside the zipper compartment. I started the day after Easter and got it in the mail by May 8th, just in time for Mother’s Day. It was a very enjoyable project and was well-received by my mother-in-law.


Note: To download the pattern for the flowers, visit the following link:
-
2024 Journal
Although some of my long-standing projects, such as the Fox Quilt and Tetris Sampler remained unfinished, I did complete many small projects throughout the year, as well as a major quilt project for our 10 year-old Maltipoo, Daisy. The second half of the year was dominated by a new hobby, Sourdough. I spent a lot of time creating a starter and trying new recipes. I also experimented with AI, creating artwork for our annual Christmas card. I had given up on getting a decent family picture with the dogs.
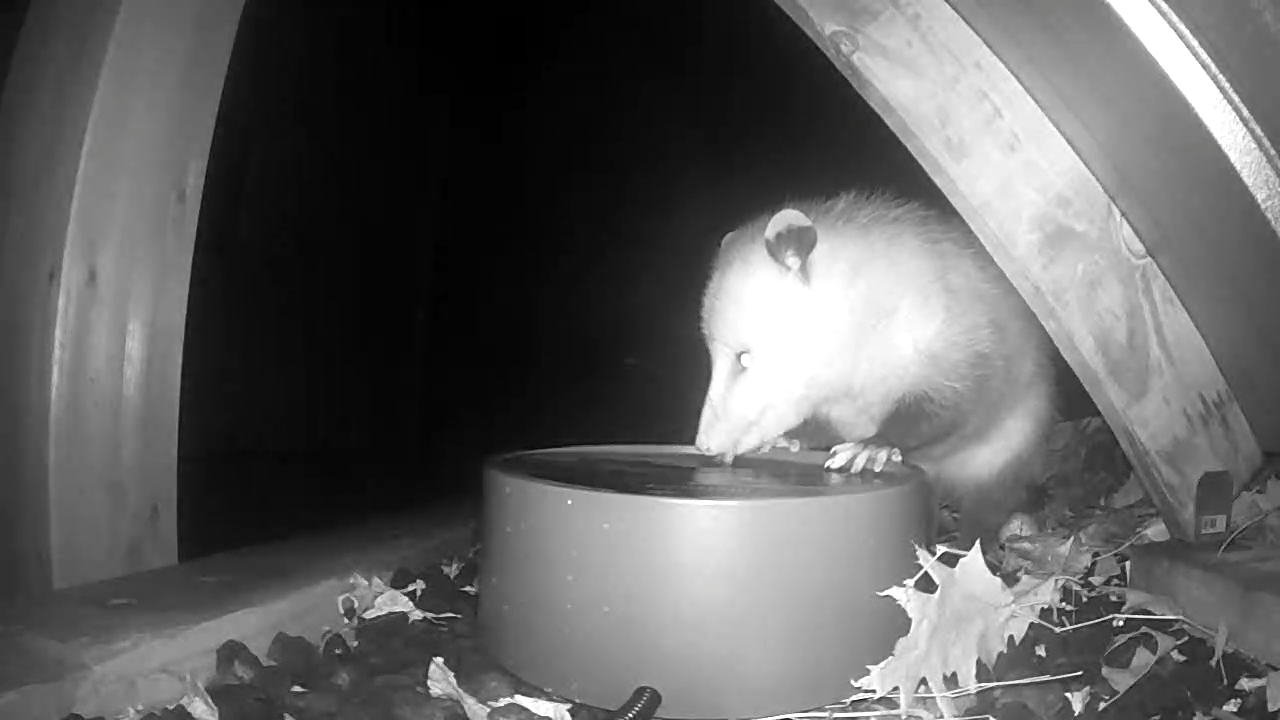
On the homefront, our two senior dogs (Daisy and Topper) experienced some health issues, so we had many trips to the vet. Both are doing well at the moment. Our newest dog, Bear turned five in July. We continued to enjoy our wildlife visitors which include foxes, birds, raccoons, and a very cute opossum. I’ve only recently learned what wonderful creatures they are–Opposums are the only marsupial native to North America, they eat ticks and their body temperature is too low to carry rabies.
Following are monthly summaries of my completed projects.
January
- Amethyst table runner
- Jeopardy birthday card (created in Adobe Photoshop)
- Love Sep sampler
- Love Oct sampler
- Tetris birthday card (created in Adobe Photoshop)


February
- Dog table runner
- Love Jan sampler
- Love Feb sampler
- Heart Lego
- Polaroid Lego


March
- Love Spring sampler
- Easter Lego
- Lotus Flowers Lego
- Cherry Blossoms Lego


April


- Watering Can Lego
- Love Summer sampler
- Peacock Lego
- Petal Jewelry Pouch – Pattern downloaded from Etsy
May
- Petal Jewelry Pouch-given as Mother’s Day gifts
- Sweater Wrap
- Love March Sampler


June
- Daisy Quilt
- Love Apr sampler
- Sourdough Starter using Beginner’s Recipe from the Clever Carrot
- Cornbread w/sourdough discard (6/21) – The Clever Carrot-Secret Ingredient Cornbread
- Sourdough Bread (6/21) – The Clever Carrot-Beginner’s Sourdough Loaf
- Pumpkin Bread w/sourdough discard (6/26) – The Clever Carrot-Pumpkin Cake
- Sourdough Loaf (6/28) – The Feathered Nester-Soft Sourdough Loaf


July


- Sourdough Brioche Buns (7/3)
- Pooh Bear Dog Bandana (7/5)
- Brioche Loaf (7/5)
- Table Runner (7/7)
- Sourdough Bagels (7/11)
- First Green Beans & Cucumber (7/14)
- Sourdough Bagels with molds (7/18)
- Sourdough baguette (7/18)
- Sourdough discard Cornbread (7/25)
- Sourdough English Muffins (7/27)
- Sourdough Discard Crackers (7/31)
August


- Sourdough bagels (8/1)
- Sourdough Loaf (8/4)
- Sourdough Round Loaf ((8/7)
- May Sampler (8/6)
- Sourdough Mini round loaf (8/14)
- Sourdough Round Loaf (8/18)
- Caddy for Family room chair (8/25)
September
- Sourdough Loaf (9/1, 9/8, 9/24, 9/28)
- Pretzels (9/15, 9/22)
- Belt Bag (9/20)
- Flower Jewelry Roll (10/30)


October
- Sourdough Loaf (10/3, 10/9, 10/23)
- Apple Cake (10/5)
- Bagels with new mixer (10/26)
- Hinzeit Sampler-June (10/19)
- Cornbread (10/29)
- Halloween (Dogs on Fox Quilt)


November
- Sourdough Loaf (11/1, 11/22)
- Pretzels, Bagels (11/10)
- Chair Covers in Progress (11/19)
- Discard Pizza (11/22)
- Baguette (11/27)


December
- AI Christmas Card (12/7)
- Lego Pointsetta (12/8)
- Sourdough Thumbprint Cookies (12/15)


-
Sourdough Season
Making a Sourdough Starter had been on my to-do list ever since COVID when I started to research bread-making. I learned that sourdough was the healthiest bread since it doesn’t require traditional yeast which causes a spike in blood sugar. Furthermore, I was never a fan of making bread from scratch, since I found kneading tedious and I always ended up with flour everywhere. Sourdough, on the other had does not require kneading (unless you are making something specific like bagels or pretzels), but instead uses a process called “Stretch and Fold.”
The downside of Sourdough is that you have to plan ahead. So if I want a fresh loaf I need to allow about 36 hours from when I feed the starter, mix the dough, and wait for it to double in size. Plus you have to allow at least a week to create a functional starter. In my experience, it took about a month since my first attempt was a complete failure. Clearly my initial starter did not have enough strength to make the loaf rise, so it was extremely dense and flat.


I started over with a new recipe from The Clever Carrot. After about a week, I discovered there was mold growing in my jar, so I threw that away and started again. This time I used 2 containers, just in case something went wrong.
Let the Baking Begin!
Finally with a functional starter I was ready to bake another loaf. I made the round loaf recipe from The Clever Carrot, which turned out great. In the meantime, I had also invested in some additional supplies, such as a kitchen scale and banneton basket.


Over the summer, I tried a few different bread recipes.
- Brioche Buns (The Pantry Mama)
- Soft Sourdough Loaf (The Feathered Nester)
- Beginners Sourdough Loaf (The Clever Carrot)
- Sourdough French Bread (The Feathered Nester)
- Sourdough English Muffins (Little Spoon Farm)
Discard
Sourdough Starter must be fed regularly (daily if kept at room temperature and weekly if stored in the refrigerator. The feeding ratio is 1 part starter:1 part flour: 1 part filtered water (I use sterile tap water, since we have a well. Chlorine will kill the starter). If you simply add to the starter your batch will grow exponentially and will soon outgrow the jar. As a rule, 1/2 should be discarded before feeding. I had a bit of trouble with this part, as I am a hoarder by nature. However, the good news is that there are many recipes you can make with the discard, such as cornbread, banana bread, and delicious cookies. Following are some of my favorites:
- Pumpkin Cake (The Clever Carrot)
- Secret Ingredient Cornbread (The Clever Carrot)
- Sourdough Banana Bread (Raspberries and Kohlrabi)
- Apple Fritter Bread (The Pantry Mama)
- Thumbprint Cookies (Little Spoon Farm)


Choosing a Name for my Starter
One of the fun parts of creating a Starter is to give it a name. Usually they are a clever variation of a famous name; for great ideas check out the Reddit Sourdough Subreddit. My starter was finally ready to use (i.e., doubling in size) on the first day of Summer, so I named it Summer Solstice 20, and the second jar Summer Solstice 21.
For most of the year I maintained multiple jars of starter. I have only recently gotten down to one jar which I renamed “DoughPool” since we are big fans of the “DeadPool” franchise, having seen the latest one, “DeadPool vs. Wolverine” in the theatre twice and also purchased the movie for streaming anytime. I also purchased the pictured Sourdough Starter jars from Amazon, which are much more user-friendly than my oversized mason jars and Pyrex measuring cups.


More New Equipment!
In September I finally got a KitchenAid Stand Mixer! I had been using a 30 year-old Krups hand mixer and decided it was time to upgrade. Although the Stand Mixer is not required for basic sourdough, it is essential when making pretzels and bagels, because the dough is very thick and would require the dreaded kneading. The stand mixer makes it a snap!


- Farmhouse on Boone-Sourdough Bagels
- Farmhouse on Boone-Sourdough Pretzel Bites
- Little Spoon Farm-Soft Pretzels
The new Stand Mixer also came in handy for mixing cookie dough for my Thumbprint cookies, which were a big hit at a cookie swap a few weeks ago.


-
Happy 10th Birthday, Daisy!

On Wednesday we celebrated Daisy’s 10th Birthday. To commemorate this milestone, I made her a “Daisy” quilt. I had similarly made a 10-year quilt for Topper, who is now 12.
I purchased the Daisy pattern from a website I follow called Cluck, Cluck, Sew. The pattern appeared in here March mailing, and I knew it would be perfect!
I purchased a fat quarter bundle from one of my favorite Etsy shops, Fabric Utopia. I liked the fabric so much that I have purchased several yards to use in another project to coordinate with the Daisy quilt.


Daisy loves to sit on top of our family room loveseat. Originally I had planned to include 10 Daisies to line up with her birthday; however, that would have been way too big for the loveseat, so I ended up making the crib size quilt, which is about 45” x 64” I had some leftover backing fabric from another project. I was a little short, since I had used it to make a tablecloth, so I pieced in a few scraps from the fat quarter bundle.
I really enjoyed making the daisies—so much that I have 11 more to use to make seat covers for our family room recliners. Hopefully, I can finish that project within the next month, although since I don’t have a hard deadline, it may get dragged out like so many of my projects!
-
2023 Recap
Recently I have been receiving my 2023 Recaps from various services such as Reddit and YouTube Music, so I thought it was time to review my accomplishments for the year. It was a busy year due to various family events, including surgery, downsizing, and retirement. 2023 will definitely be remembered as a very significant year.
Although I still have several major projects that are unfinished (including the fox quilt pictured above), I did manage to complete a number of smaller projects, especially in the first half of the year. I have read several articles about how to manage UFOs (i.e., UnFinished Objects), and I truly hope to complete most of my unfinished projects in 2024.
More Mug Rugs
I found a cute pattern on Etsy for another Mug Rug. I made five of them in the spring and have enjoyed giving them as gifts throughout the year.
Click here to view the Butterfly Pocket Mug Pattern


Table Runners
I’ve been spending a lot of time on Etsy and downloaded a number of PDF patterns throughout the year. One of my favorites was this table runner pattern. I made several for myself, 5 or so as gifts, and I even sold one on Ebay with some vintage tea sets.
Click here to view the Francis Table Runner Pattern

Easter Gift 
Mother’s Day Gifts 
Sold on Ebay with Tea Sets Etsy has also become my go-to for purchasing fabric, especially since I no longer have access to my favorite fabric shop in Gettysburg. The Etsy sellers ship quickly and have a great selection. Listed below are some of my favorite shops:
Fabric Utopia Etsy Shop or Fabric Utopia Website
Sewing Projects
Although I have stopped production of vests, I did make one last year. I tried a different pattern this time, with a zipper instead of snaps. The pattern I downloaded from Etsy was a “Painters Vest;” however, I decided to customize it as a “Groomer’s Vest,” to hold all of the combs, brushes, and scissors we use for grooming our three dogs. I added some dog fabric details and was excited to present it to my husband for Father’s Day.


I also completed a sewing project I started at least 30 years ago. (This is why I rarely get rid of unfinished projects!) We decided to dress as 1980s style fitness instructors for Halloween (we had recently joined a fitness center). I had started a leotard many years ago which was 80% completed. I’m not sure why I never finished it–maybe I didn’t have the right kind of elastic. Thanks to mask-making in 2020, I had plenty of ultra-thin elastic, so I completed the legs and enjoyed wearing my creation to the fitness center for our Halloween workout. I purchased some 1980s-style leg warmers from Amazon, and even dressed our dogs to match with doggy tee-shirts and sweat bands. (Bear would not wear her sweat bands!)

Cross-Stitch
I also made some progress on my Hinzeit Samplers. I have purchased all of the monthly samplers, as well as the four seasons and several others. I have twenty in all and as of this writing I am halfway there, having completed five in 2022 . I eventually plan to combine them in groups of four using seasonal fabric scraps. I enjoy these small projects because they are portable and quick.


I have a major project that I started in 2020 that is still not complete, a Tetris sampler that I designed. It was supposed to be finished for my son’s 25th birthday, but he is now 28. Although I made a lot of progress, it wasn’t finished in time for his birthday, so I sent a Level 28 e-Card instread.

Designed in Microsoft Excel 
Status as of 12/31/22 
Status as of 12/31/23 
Etsy
I finally sold my railroad vest in October! It only took two years. I have decided to give my creations as gifts rather than sell them. My husband was sorry to see it go, even though it had been hanging in my sewing closet, unworn. I still have a few collectibles for sale in my Etsy Shop; however, I am a much better customer than seller!
-
2022 Year in Review
I started the year off making another vest for my husband, per his request, he wanted a denim vest. I lined it with burgundy ripstop. Later in the month I began work on Topper’s memory quilt, completed in time for his 10th birthday on February 6th. I also finally opened my Etsy store with the Railroad Denim Vest I had made in December 2021.


For Valentine’s Day, I made another denim vest for my husband. I purchased additional Lego sets for me and enjoyed putting together roses, lovebirds, and sunflowers.


In March we spent quite a bit of time organizing our basement. Unfortunately, I did not think to take before and after pictures, but we did make a great deal of progress. It had become a overrun with boxes when we had to empty the contents of our attic storage when our roof was replaced in 2020. We donated and recycled a lot of old electronics, clothes, and boxes.


In April, I added some new items to my Etsy store to complement my Railroad Denim Vest. I recently sold one of these brass trains, my very first Etsy sale, so I was very excited.

In May I made a second “Memory Quilt” for the dogs out of their grooming bandanas. I also updated and reintroduced my blog using WordPress.com. I had previously used a hosting company with WordPress.org which required a lot more maintenance on my part (e.g., updating plug-ins, which are mini programs that add various features). I am very glad I made the switch to WordPress.com and it is worth a slightly higher monthly fee since they provide great service as well as a free domain name!


I made a few more vests in June and worked on some other sewing projects, such as a gardening apron.


July and August were dominated by the online “Intro to Photoshop” class. I used my new skills to design a new logo for my blog and started making custom cards for family and friends. I also enjoyed creating virtual costumes for my dogs for Halloween.
By September I was back to quilting and I made a few quilts as gifts with some beautiful fabric I purchased at my favorite fabric shop in Gettysburg, The Needle & Thread.

Amazing Grace Quilt 

In October I purchased a number of Hinzeit samplers to work on and completed a few of them during the fall. I have twenty to complete, most of them seasonal. I plan to combine them in groups of four and hang them over the mantle. I enjoy these small projects and keep one in my purse to work on if I have to wait at a doctor’s appointment, etc.


I finished up the year with several sewing projects. For my husband, I made a lightning fabric jacket. The jacket was considerably more work than the vests and used a lot more fabric, thanks to the sleeves and hood. I will not be making more of those any time soon!


I also completed several Mug Rugs using a pattern purchased on Etsy. With each mug rug, I included a coordinating mug and gift check in the pocket.


Finally, I started working on these Snowman Family Mug Rugs, using a variety of scraps from my previous quilting projects. This pattern was downloaded from ePatterns-Cental.com.


-
September Milestones
September was a bittersweet month. The Queen’s passing on September 8th hit me hard. I had a renewed interest in British history due to watching both “The Crown” and “Downton Abbey” earlier this year. I had also recently discovered a black & white photo of the Queen my (late) mother had saved from when she had seen the Queen during her United States tour in 1957. I was looking for old black & white photos to colorize as part of a Photoshop assignment.

I’m not sure why the Queen’s death was so personally upsetting. Perhaps it’s because I know that there will never be another Queen in my lifetime. She represented nearly a century of history, meeting with Prime Ministers from Winston Churchill to Liz Truss two days before she died. She witnessed so much history and it seemed like she would always be there. Just like that, she was gone.
I had just finished watching the Royal Funeral, when I learned that one of my dearest childhood friends had lost her mother, who was also 96. The funeral was local, so I was able to attend. Before the end of the month yet another dear childhood friend lost her 95 year-old mother. I felt like the world had lost three queens. I had known these women since I was about twelve, they were devoted to both family and God. Like Queen Elizabeth II, they were strong, steadfast, and always proper ladies. I always enjoyed spending time in their homes.
Fortunately, I could also happily celebrate my Mother-in-Law’s 90th Birthday. I made her two quilts to commemorate the occasion. I also made a quilt for a good friend using beautiful fabric designed by the artist Abraham Hunter.
Amazing Grace Quilt 
9-Square Pinwheel Quilt 
Quilt Tag and Custom Card 
-
A Year of Vests
In Spring 2021 I started making fisherman-style vests. I had read that they were becoming popular as tech vests. After looking online for one to buy, I decided that I would have better luck making one to my husband’s specifications. Working from home since March 2020, he needed to keep two cell phones, ear buds, glasses, and dog supplies handy at all times.

I purchased a pattern from an Etsy store and made my first vest using leftover brown gabardine fabric from the “Jon Snow” cape I made for Halloween 2017. The pattern called for one upper pocket; however, I added a second since my husband has two cell phones. The vest was completed in time for his March birthday.

For my next vest, I used this great Camouflage twill I purchased at my favorite fabric store in Gettysburg, The Needle & Eye. This vest was completed in time for Memorial Day. I made larger upper pockets and added D-rings to the upper pockets and lobster claw clasps to the lower pockets.
My third vest was for Father’s Day. I had planned to make a two-tone vest (Style D) pictured on the pattern cover. I had purchased burgundy and gold twill, along with cute football buttons, but apparently my husband thought that was a bit much.

Unfortunately, I was lacking enough of either color to make a complete vest. However, my husband had a bright idea: use one of the fabrics as the lining. Although I had to make the shorter length vest (Style B), his idea inspired me to learn how to create a fully lined vest (the pattern had “facings” around the neck and armholes). I found this tutorial for making a lining. The lining made it much easier to add inner pockets, since I didn’t have to worry about seeing the stitching from the other side.
After trying out the new vests, my husband had a few suggestions. Add inner pockets for his phones, and attach the D-rings higher for his Apple AirPods and Samsung EarBuds. He also wanted one of the upper pockets replaced with a pouch that could be used for his glasses. I also experimented with different types of snaps and buttons on the pockets.

So now that he was finally happy with a vest, I had to disassemble the previous two and add a lining and the additional pockets. I later retrofit a lining, made more elaborate inner pockets, and modified the original outer pockets. By the fall, I had modified the original three vests, as well as two more I made over the summer.
For the summer vests, I had switched to lightweight cotton/polyester blend broadcloth. I made a “Timber” Camouflage and Orange Bicycle Safety Vest. By this time I was lining all of the vests. I added interfacing to the pockets and vest front to give the lightweight broadcloth more body.

With the holidays approaching, I wanted to make some vests as gifts. I made a royal blue broadcloth, lined with tan and green twill lined with camouflage nylon ripstop. I was also adding button tabs to hold the D-rings. So I had to do one more round of modifications on the original three vests to remove the old magnets and replace them with the new style. I made a railroad denim vest to sell on Etsy.

This year I made several denim vests, a second bicycle safety vest in red, as well as a pool side vest out of a tropical-theme broadcloth and lined with terry cloth. I also made a second blue & tan vest for my husband. The specs for all of my vest can be viewed in my portfolio. My bicycle safety vest was recently featured on Instructables.com.